Spring_Boot
Chapter 1: Basics
- J2SE-Java Standard Edition(Core Java)(Console application)
- J2EE- Java Enterprise Edition(Advanced Java)(Enterprise level application-Company level application)
- EJB-Enterprise Java Beans(Server-side component for java platform)
- It enables rapid and simplified the development.
- server side ( program run on server machine)
- web server( Apache Tomcat, Jetty)
- Hibernate(ORM-Object Relational Mapping tool)
- It enables rapid and simplified the development.
- server side ( program run on server machine)
- web server( Apache Tomcat, Jetty)
- It provides framework for object oriented model to relational database.
-----------------------------------------------------------------------------------------------------------------------------
Chapter 2: Introduction
Spring Boot:
Easy to create stand-alone, production grade, Spring based application that you can "just Run".
Opiniated view of the Spring platform
Configuration:
* JAR file: Java Archive files ---> Zip files containing java class files.
* We need lot of external jar file to do a project(e.g. project want to read a pdf file, want to connect with browser.)
* JAR files for core java application
* WAR files: Web Archive files
* WAR files for web applications
* Collection of JAR and WAR files put into the configuration file.
* When you compile a core java program it will change .class file but if you compile a web java program it will change as War file.
Spring Features:
2. Dependency Injection
+ not mention the object name and class name directly which object is depend on.
+ Because if you directly mention the depended object directly you should edit it every time when you change the object
+ It avoid tightly coupling
+ Unit test will be easy
+ @Componenet creates a new object in spring container
+@Autowired call the object and if multiple object mentioned then @Qualifier used to mention it and also you should mention name of the object in @Component("xxx")
+ connect between machines, simple HTTP is used to make calls between machines.
+ a client runs on a user’s computer and initiates communication
+ a server that offers an API to access its data
+ a client runs on a user’s computer and initiates communication
+ a server that offers an API to access its data
+ a resource, which is any piece of content that the server can provide to the client
+ To get access to a resource, the client sends an HTTP request (GET, POST, PUT, DELETE).
+ To get access to a resource, the client sends an HTTP request (GET, POST, PUT, DELETE).
+ GET - Read/retrieve data from server
+ POST - send data to server
+ PUT - modify data on the server
+ DELETE - delete data on the server
+ In return, the server generates an HTTP response with encoded data on the resource.
+ In return, the server generates an HTTP response with encoded data on the resource.
+ In past SOAP technology is used for this purpose.
4. MVC (Model View Controller)
+ Spring follows MVC pattern.
+ Controller instructing to model how to respond to user input
+ Model Storing and retrieving data
+ View rendering of model & UI
5. Separate web server is not needed for Spring boot.
6. No War files configuration and management
-----------------------------------------------------------------------------------------------------------------------------
Chapter 3: Maven
Maven(Knowledge accumulator):
* Configuration management tool
* Software project management and comprehension tool
* Used to accumulate jar files
* Gives default project structure
* Dependencies auto download
* That dependencies were auto compile
* Server starting and stopping
* POM file :
+ Project Object Model
+ XML file
+ User put list of jar and war files with version they want to complete their project
+ Maven automatically download these jar files from internet.
Develop a simple maven project:
* Open Eclipse
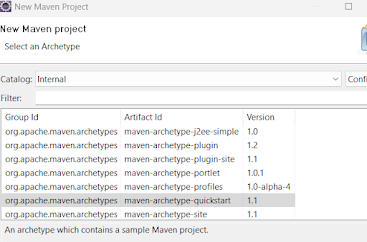
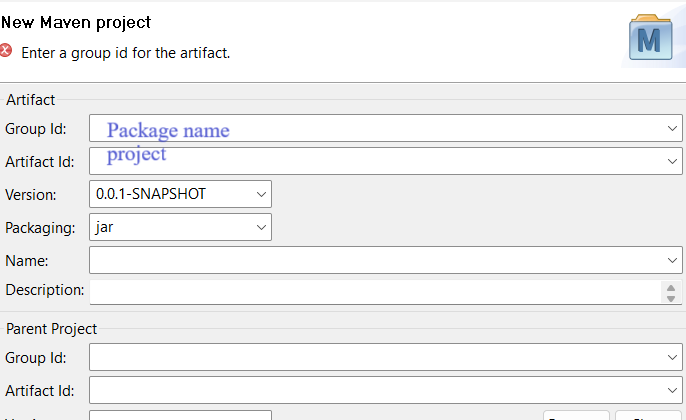
* File --> New --> Maven Project or File --> New --> Project --> Maven --> Maven Project
* Check "skip archetype selection" checkbox then click next.
*
-----------------------------------------------------------------------------------------------------------------------------
-----------------------------------------------------------------------------------------------------------------------------
Chapter 4: Spring Boot Project
* Open Eclipse
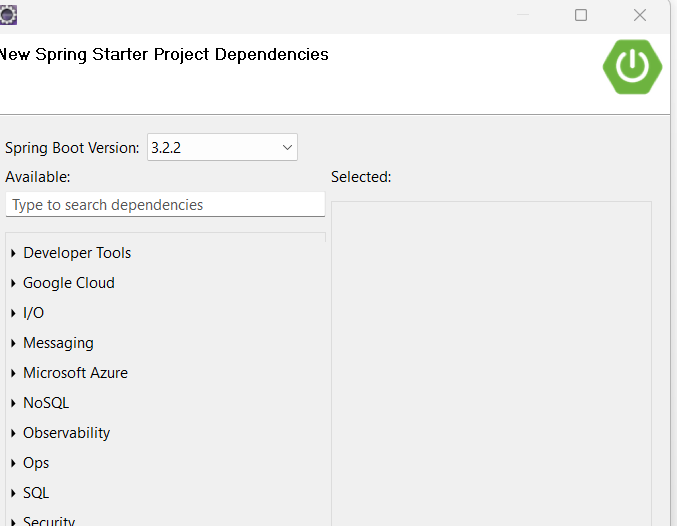
* File --> New --> Project --> Spring Boot --> Spring Starter Project --> next
* New spring starter project window appeared.
* Fill the details and click next.
* pom.xml has project details and dependencies
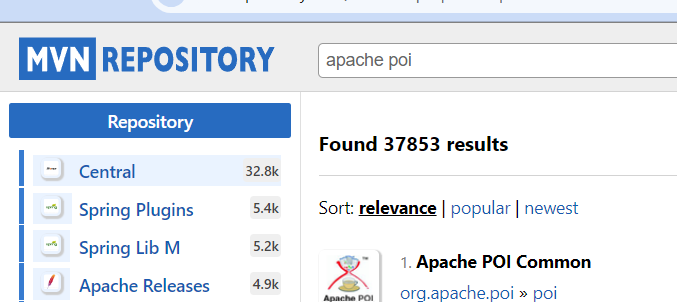
* If you want to add more dependencies then go to "MVN Repository"(Google search) and search particular dependency(Apache poi).[local repo==our system, central repo ==mvn repo]
* Choose version and select maven for dependency
* Copy the above maven dependency and paste it in pom.xml file
* This maven dependency has Group id, Artifact id and version , this information is enough for pom.xml file to download the above jar file from internet.
* @SpringBootApplication --> annotation tells the compiler it is the Spring Boot application.
* SpringApplication . run (Myspproject1.class) --> Run this application as a spring application
* For create new class right click on your project in Project explorer choose New > Class
* Declare variables
* To give getter and setter method for the variable then right click the class name and choose source > generate getter and setter method.


Comments
Post a Comment